Intacct Smart Event Emails Made Easy
Intacct Smart Event Customer Pick
Intacct Smart Events are a logical next step in the goal of every company: how do we work smarter, not harder?
Let’s walk through an example of that here. Imagine you have a quickly-growing customer base and you want to communicate with your VP of Sales to let her know whenever you add a new customer in your Residential business line. Sure, that VP of Sales can always run a report, or even have a report scheduled that can help her along, but what if we need to know instantly? That’s how an Intacct Smart Event can help.
Within Intacct, simply navigate to either:
- Customization Services > Smart Events Catalog > Add
- Navigate to the object you want to add a Smart Event (in this case, Customers) > Object Definitions (on the toolbar) > Smart Events > New Smart Event
Note: the navigation can be slightly different depending on whether you have “platform services” enabled but the steps are the same.
Step 1: Choose Thy Object
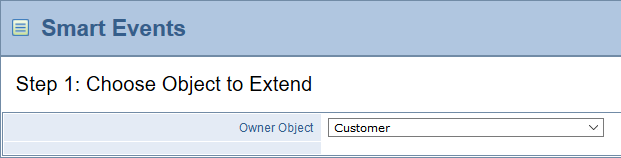
We’re now in a wizard! This starts easy by picking the thing we want to extend a Smart Event to. I already have Customer selected, so off we go.
Step 2: Select Properties
Intacct Smart Event Wizard
Things are getting more complicated, but we can manage. The first “Events” section is where we tell Intacct when to fire this rule off. In this case our choices are Add (when a customer is created), Set (when our record is updated), or Delete. I picked Add in my example, but choose based on your needs.
The “Condition” section is where we set our criteria. We could leave that blank and then this rule would fire on all saves. I only want this to activate when the customer type is Commercial. A few notes here:
- Finding the field names is a bit tricky. On the Object Definitions menu choice you can find the technical name for the fields. In my case it was
{!CUSTOMER.CUSTTYPE!}. - The operators are similar to what you might see in PHP. The most common to know are:
&&is AND||is OR!=is UNEQUAL==is EQUAL
Life just got a bit more technical, to be sure, but this complexity brings many options with it.
Step 3: Email Properties
At last we write our email. We can go crazy adding fields from Intacct if we’d like, but I kept it simple.
Email: This is the address you want the email to go to. Just like in the body, you can use a field from Intacct here also!
Subject: The email’s subject is picked here. To be fancy, I’m showing the new Customer ID here.
Attach PDF: If this Intacct Smart Event had been on a Sales Order, for example, wouldn’t it be great to attach a PDF of the order?
Body: Here’s where you communicate to the recipient. Add hyperlinks, information about the record, or whatever makes sense.
Last Step: Deployment
Easy! Just name this Intacct Smart Event and you have it. If you ever decide you want to pause this, you can change the status to inactive without losing your work.

